These are the instructions to install the IFace interface inside of the YAESU FT-1000MP Mark-V Field. The installation is very easy.
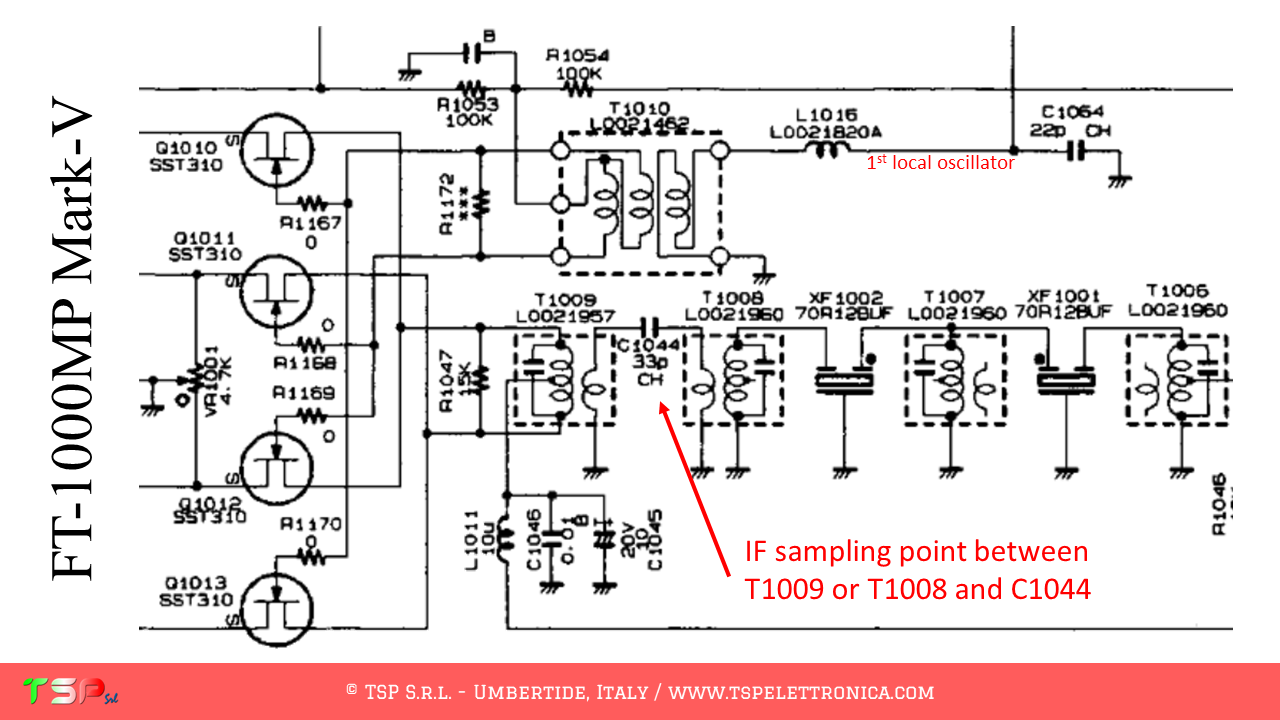
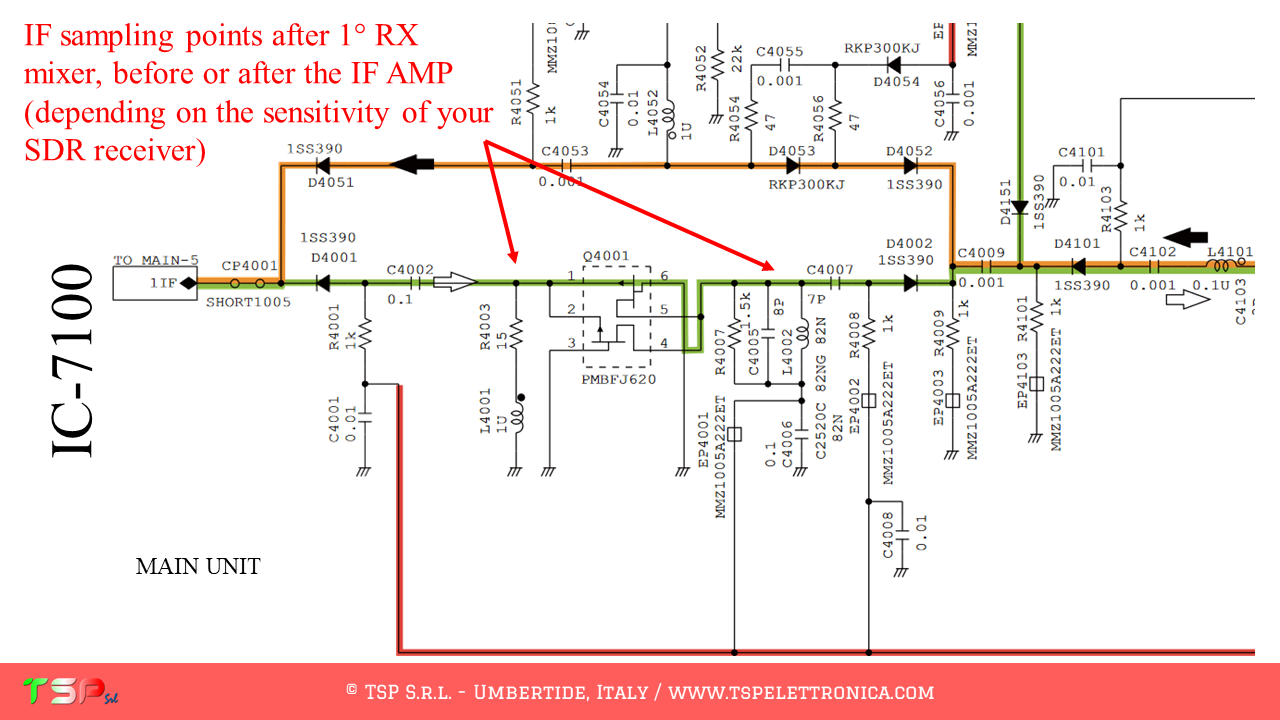
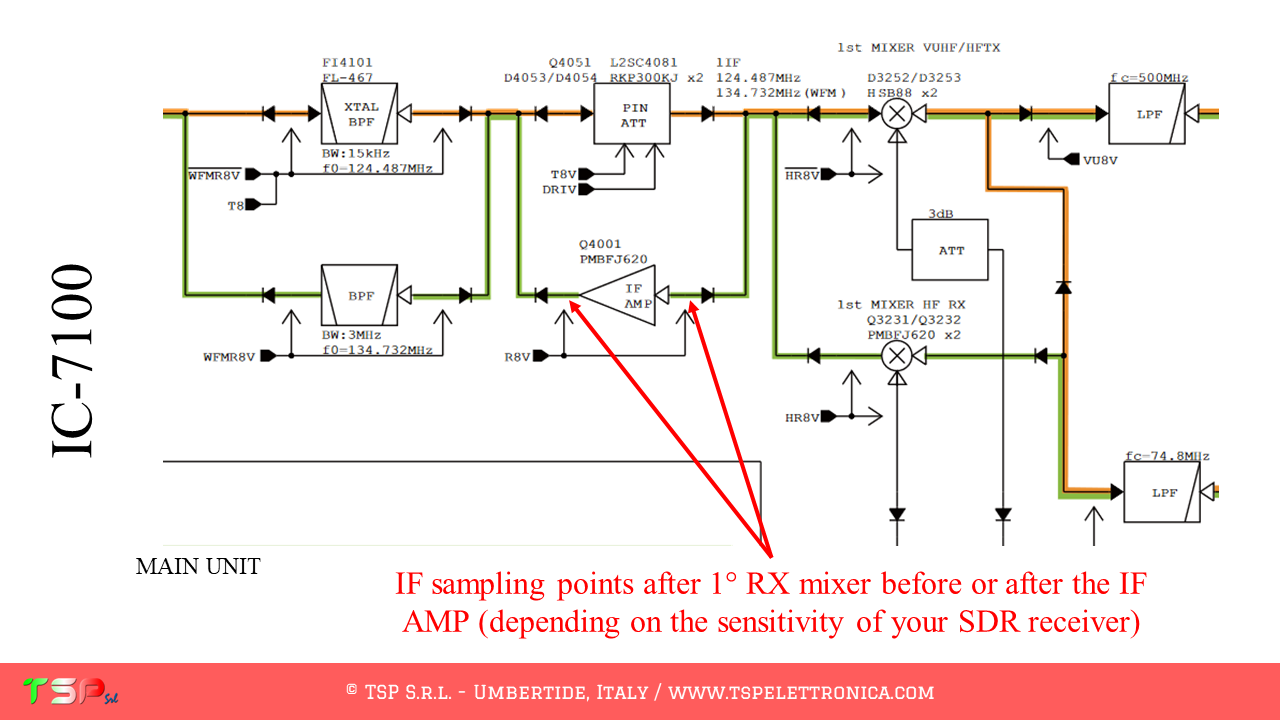
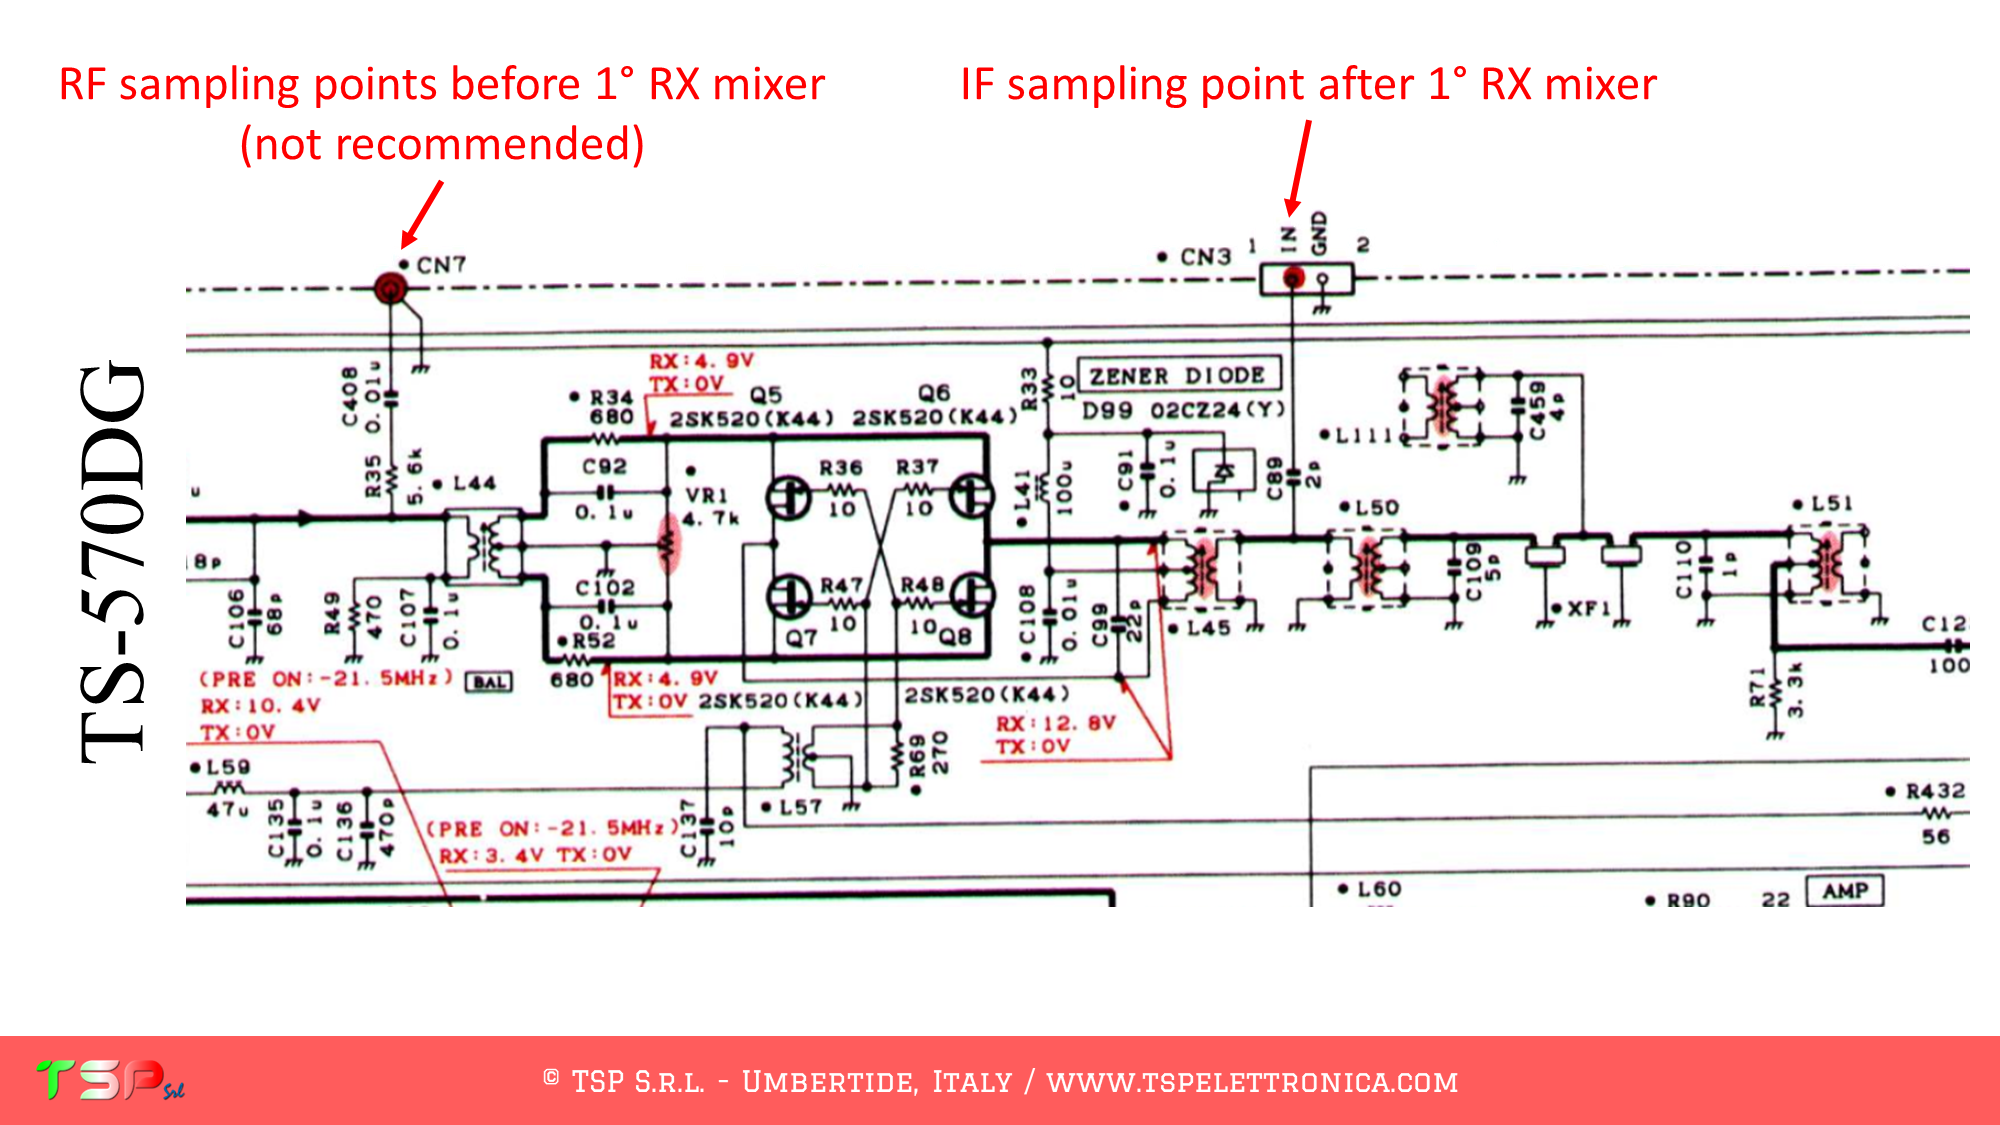
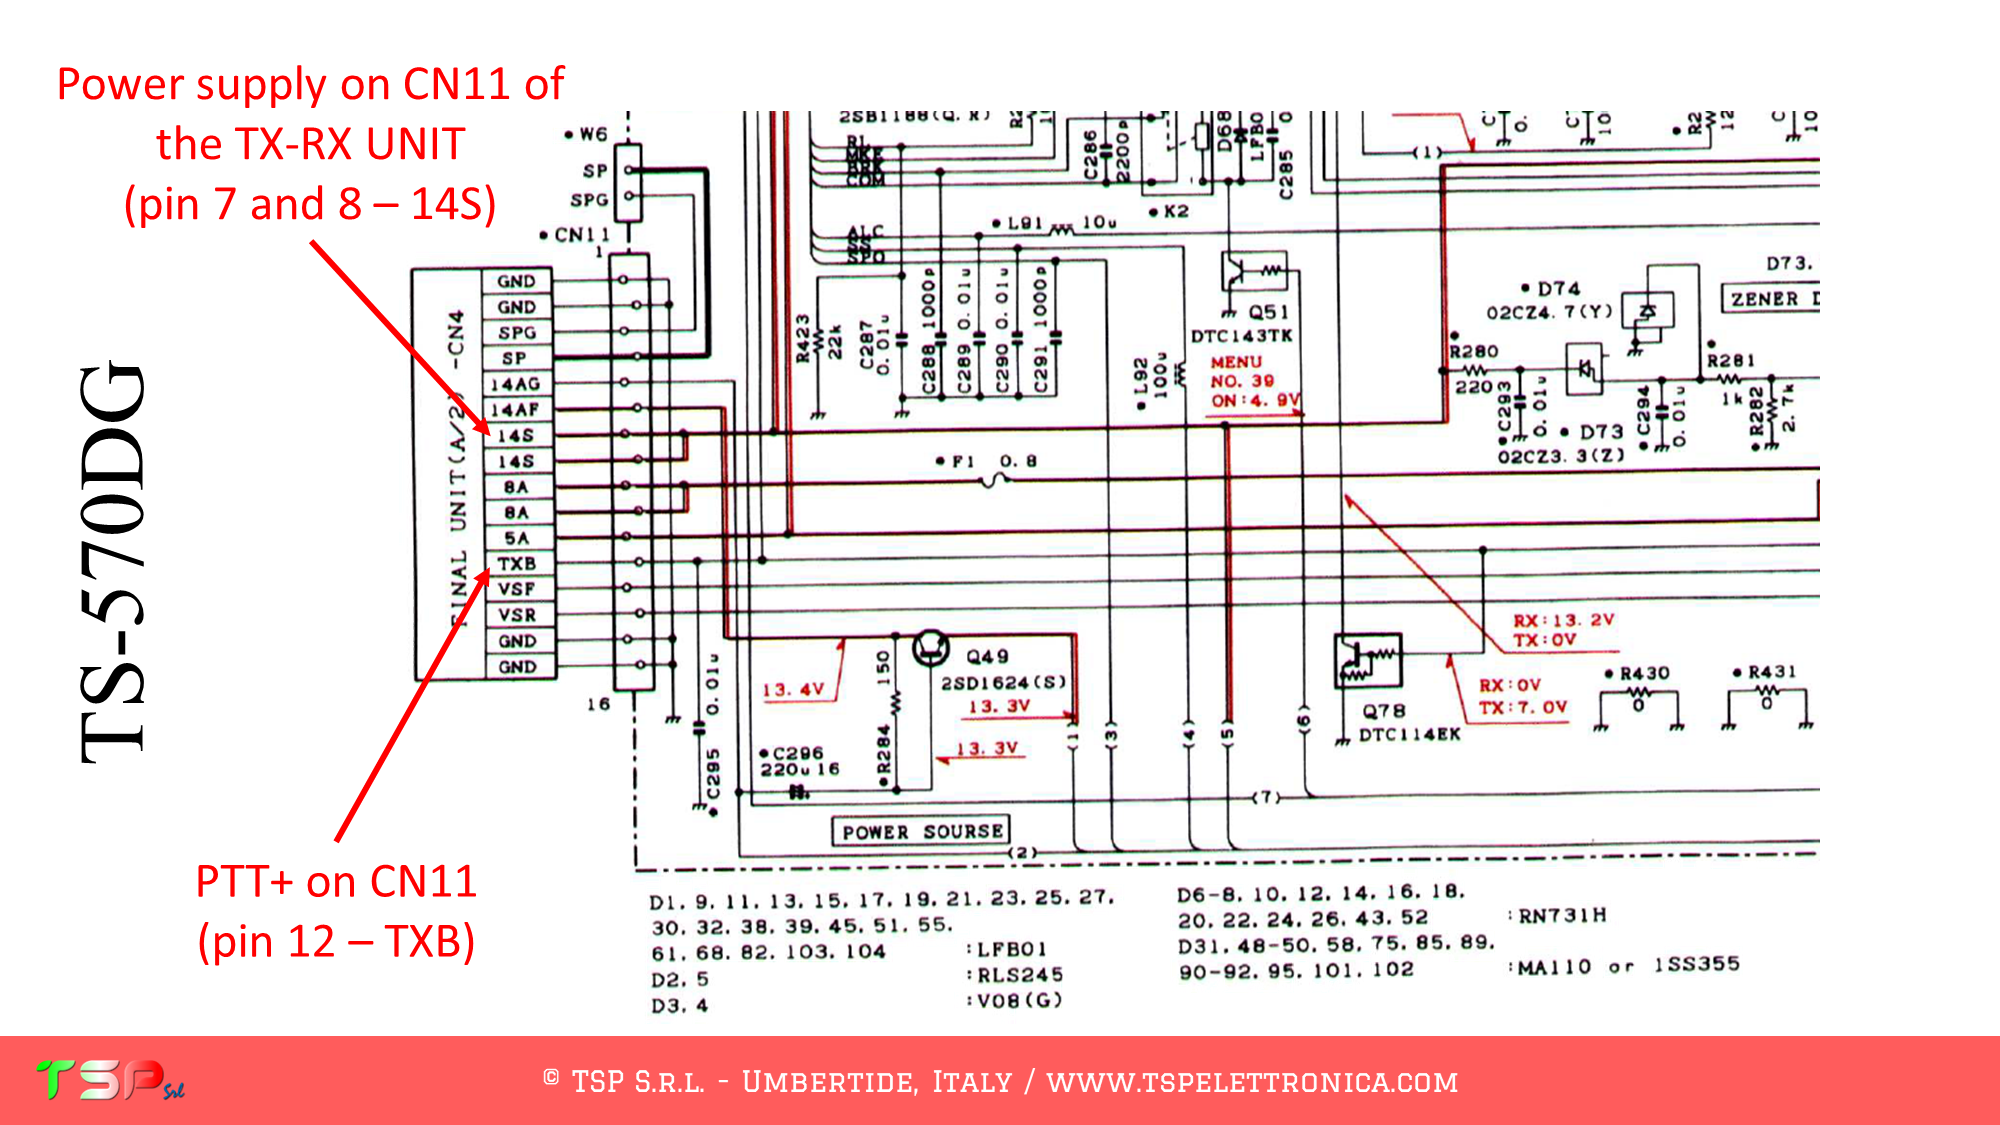
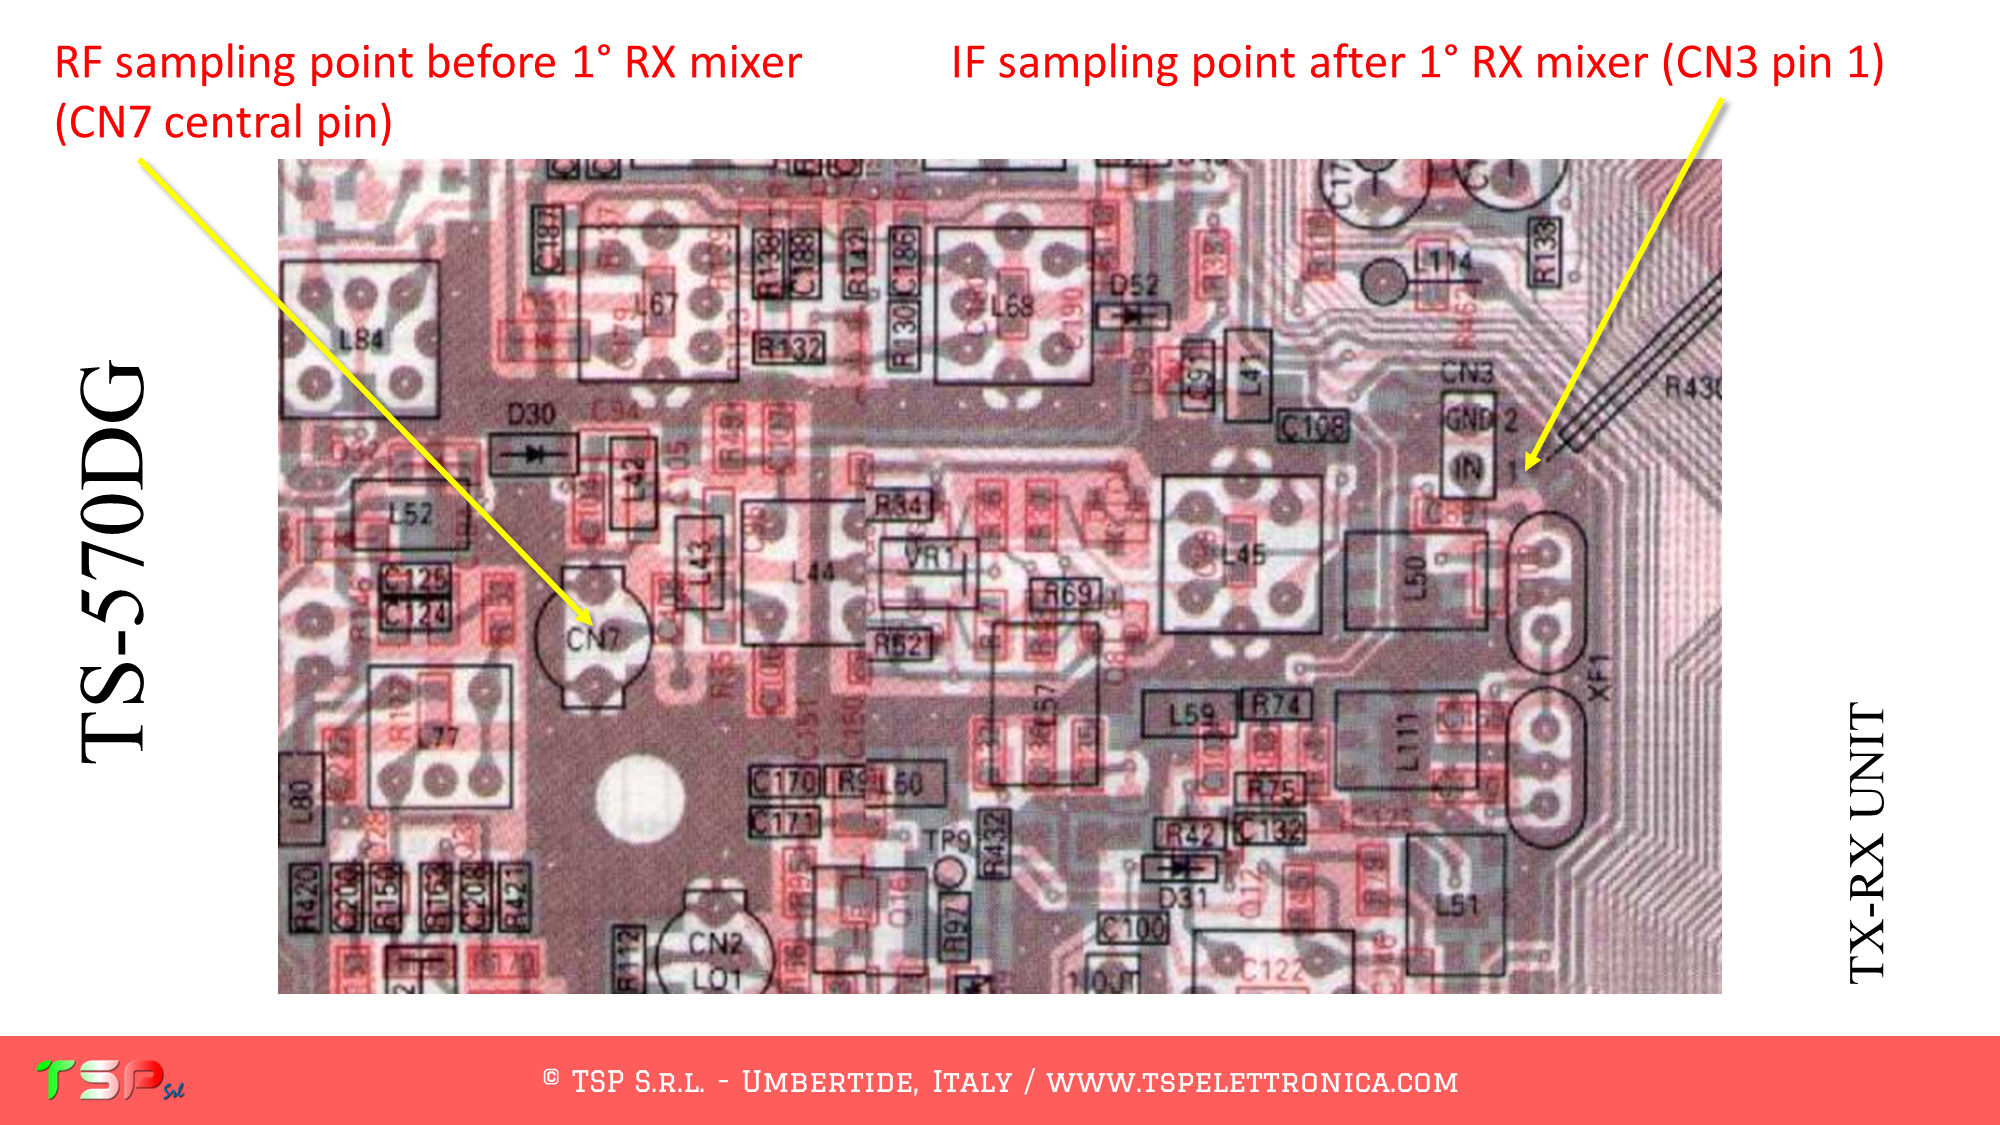
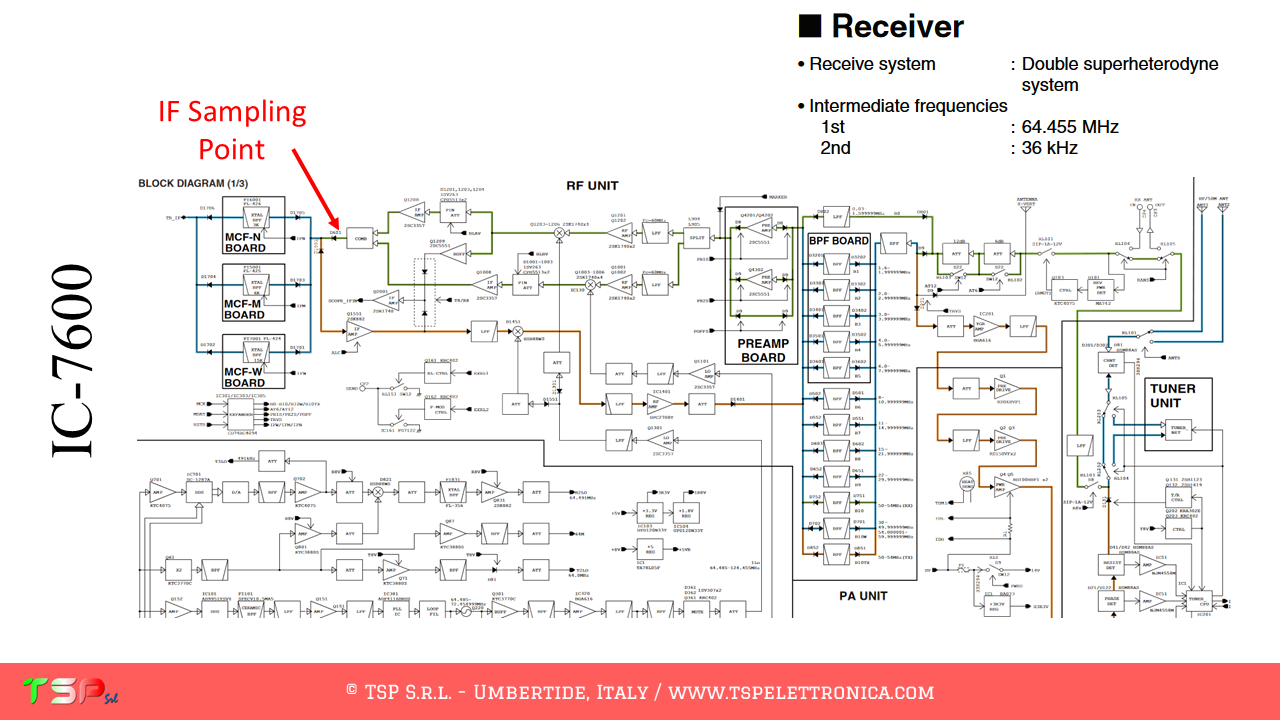
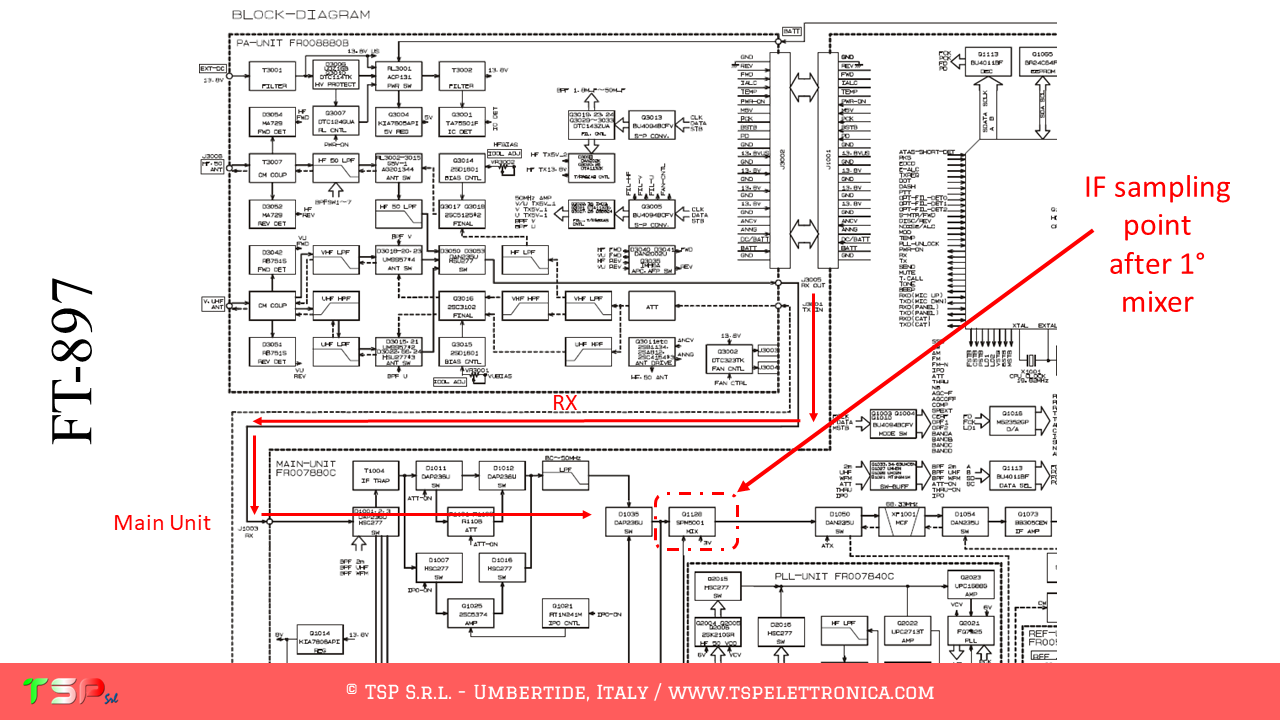
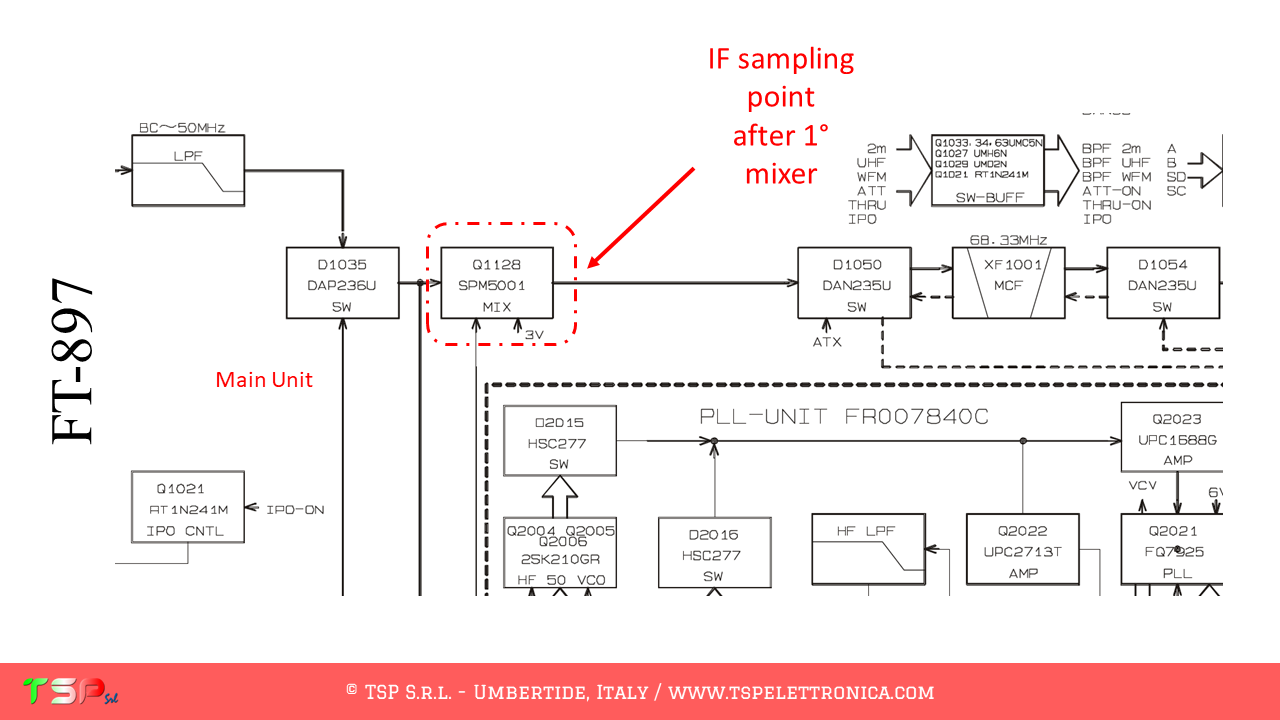
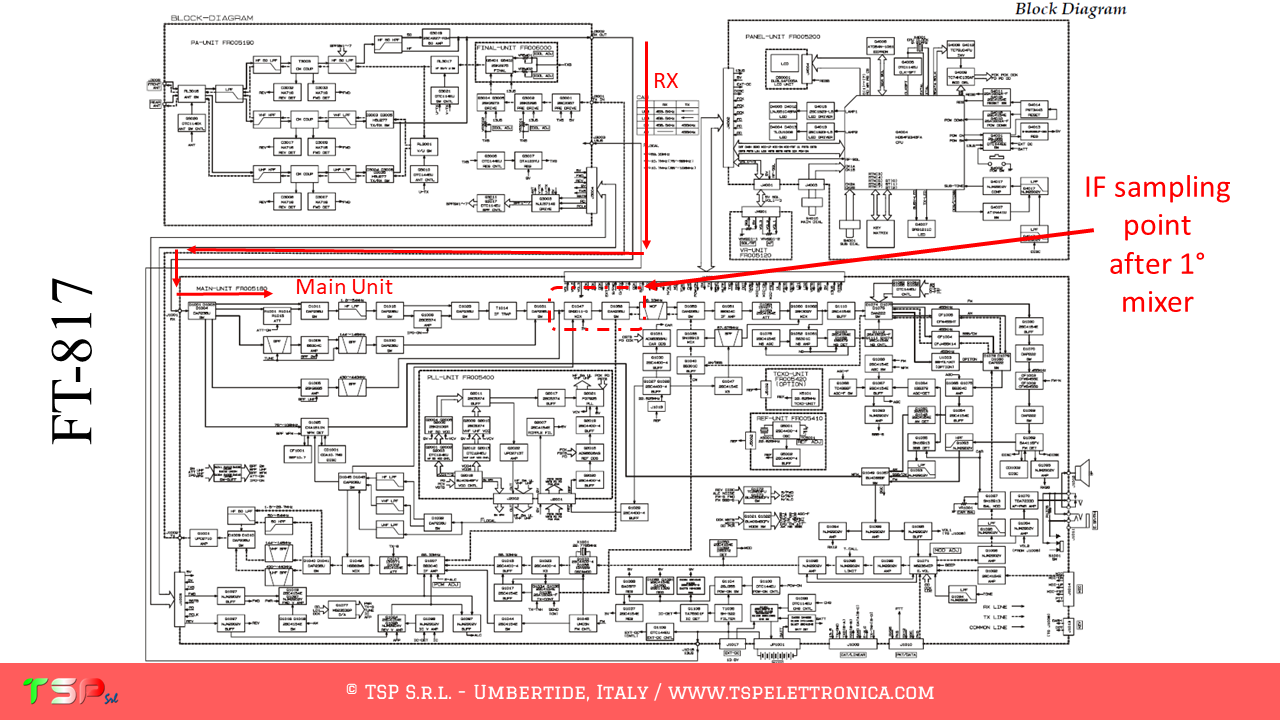
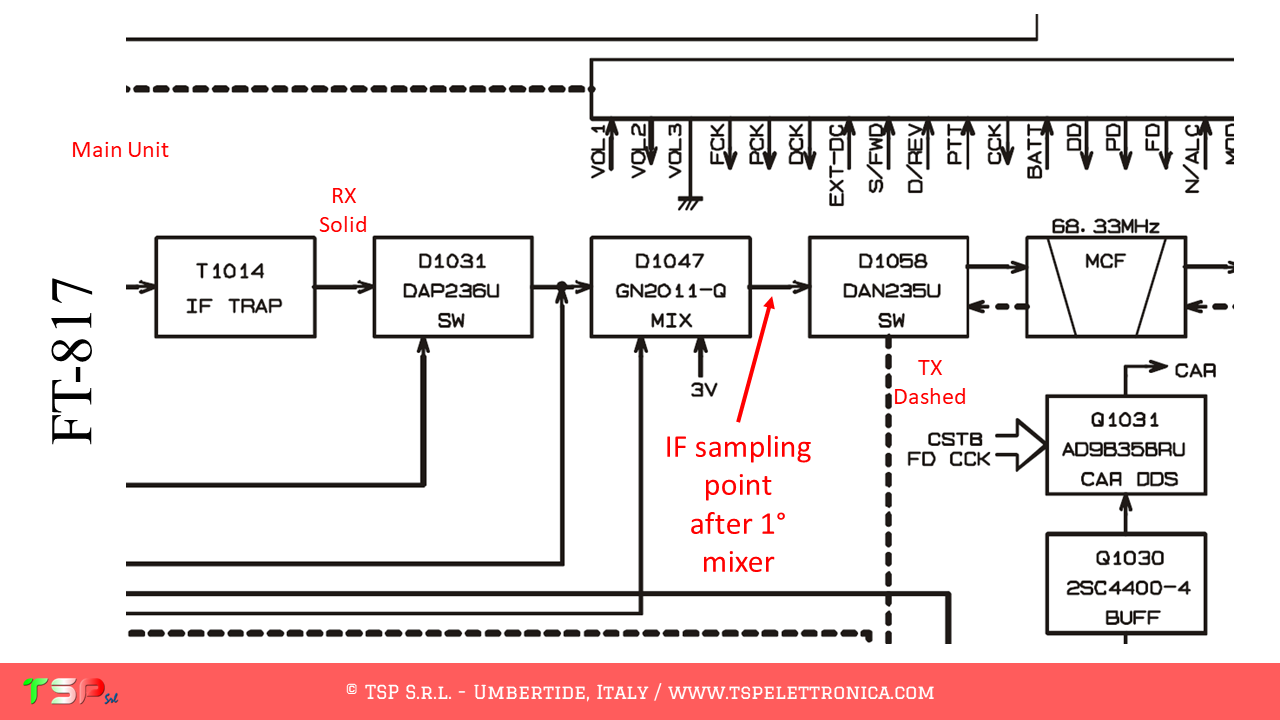
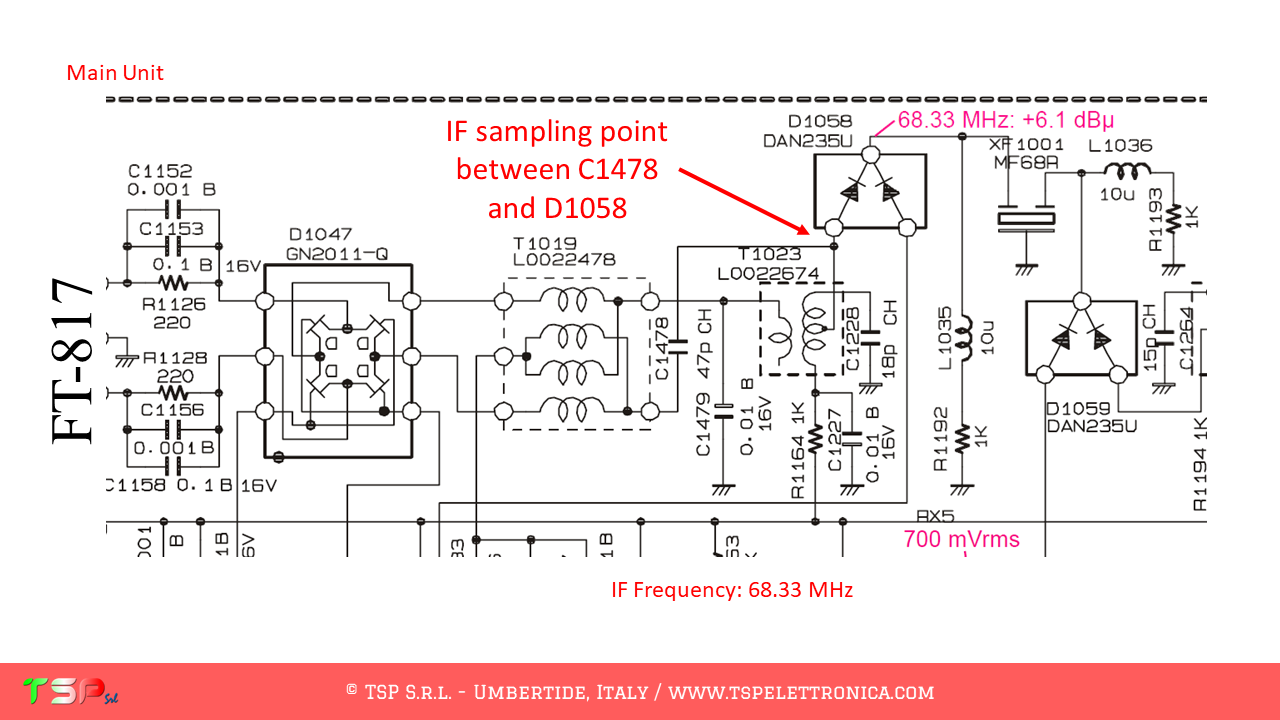
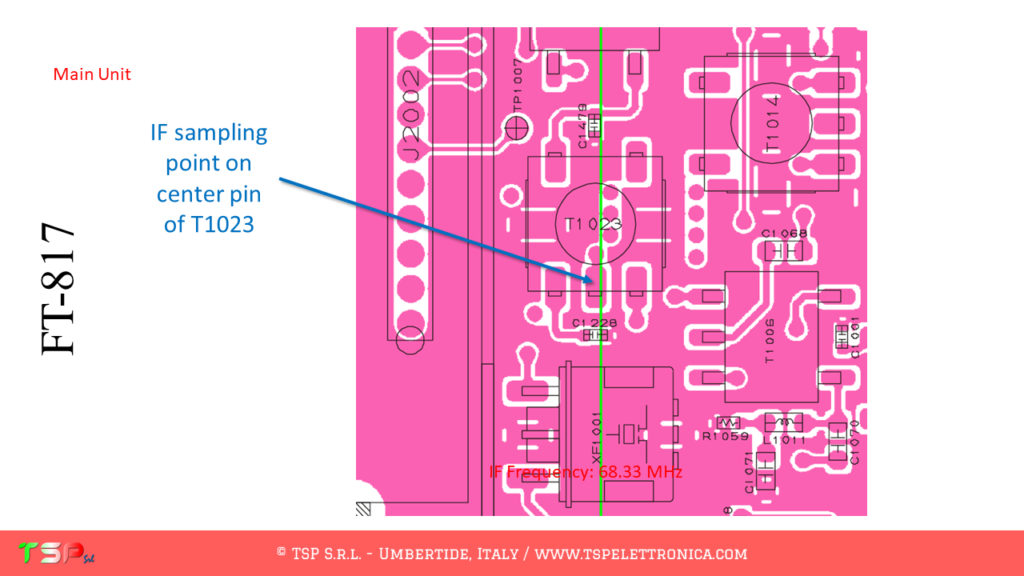
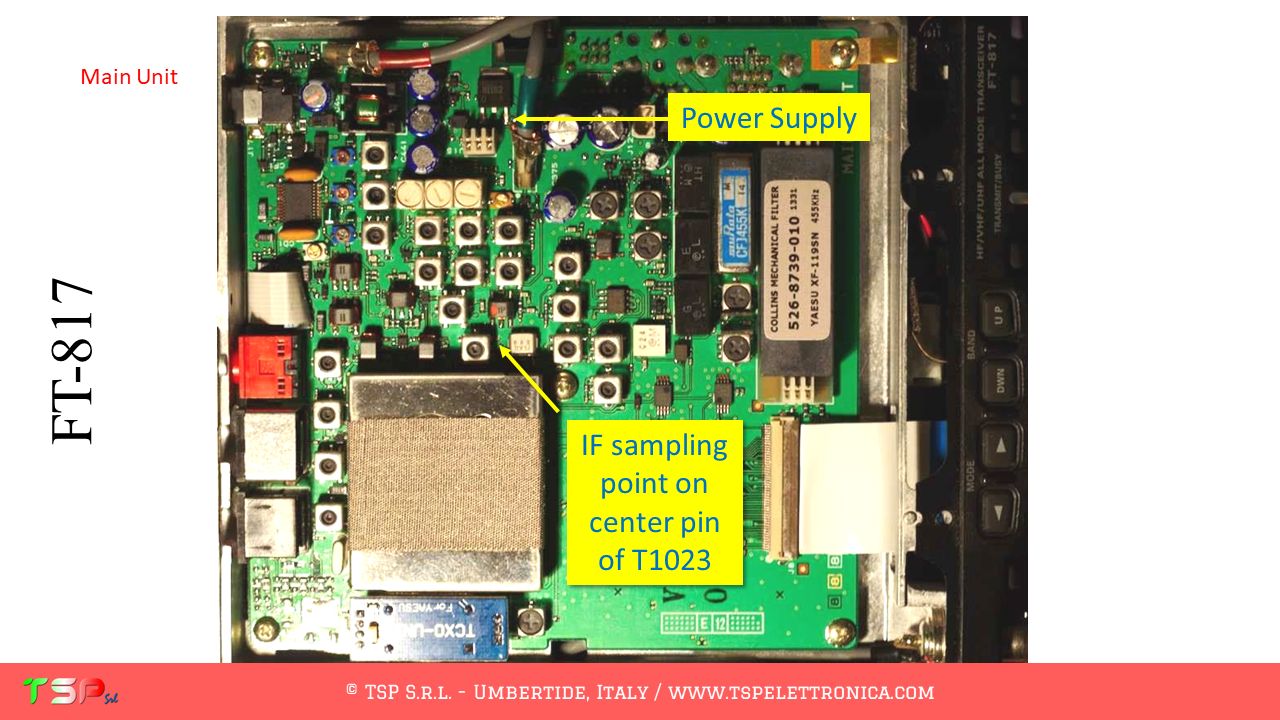
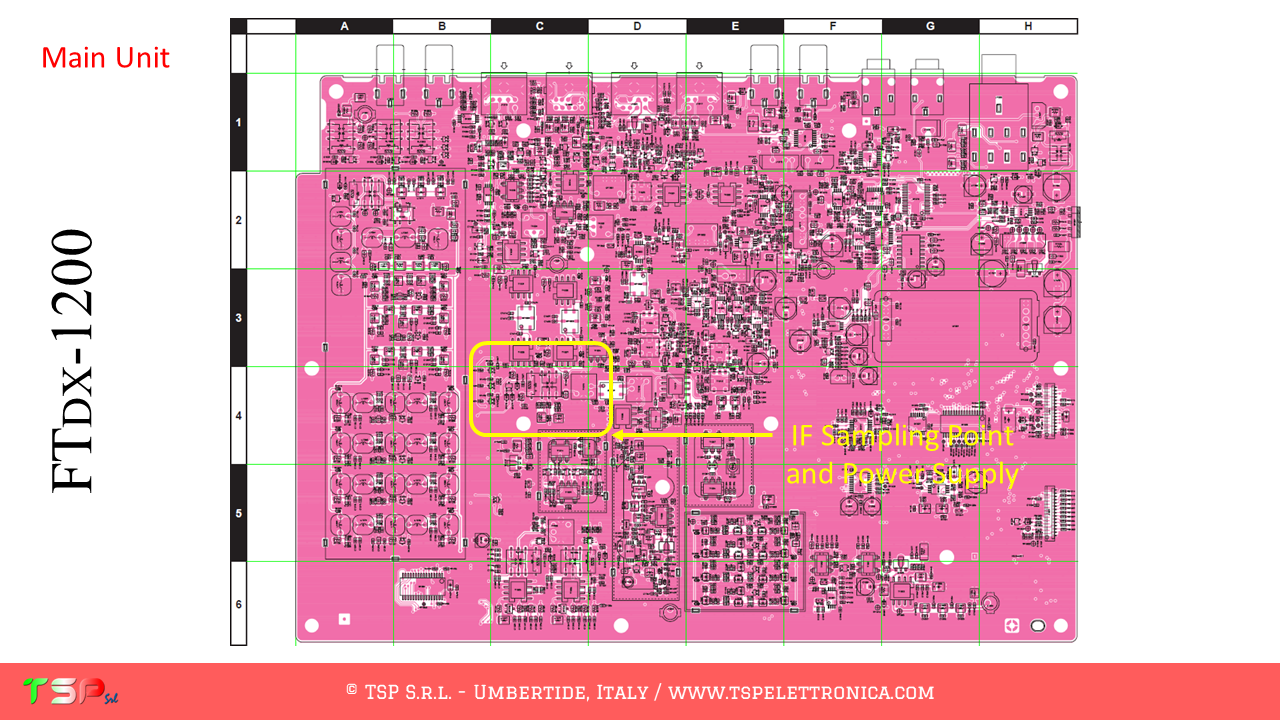
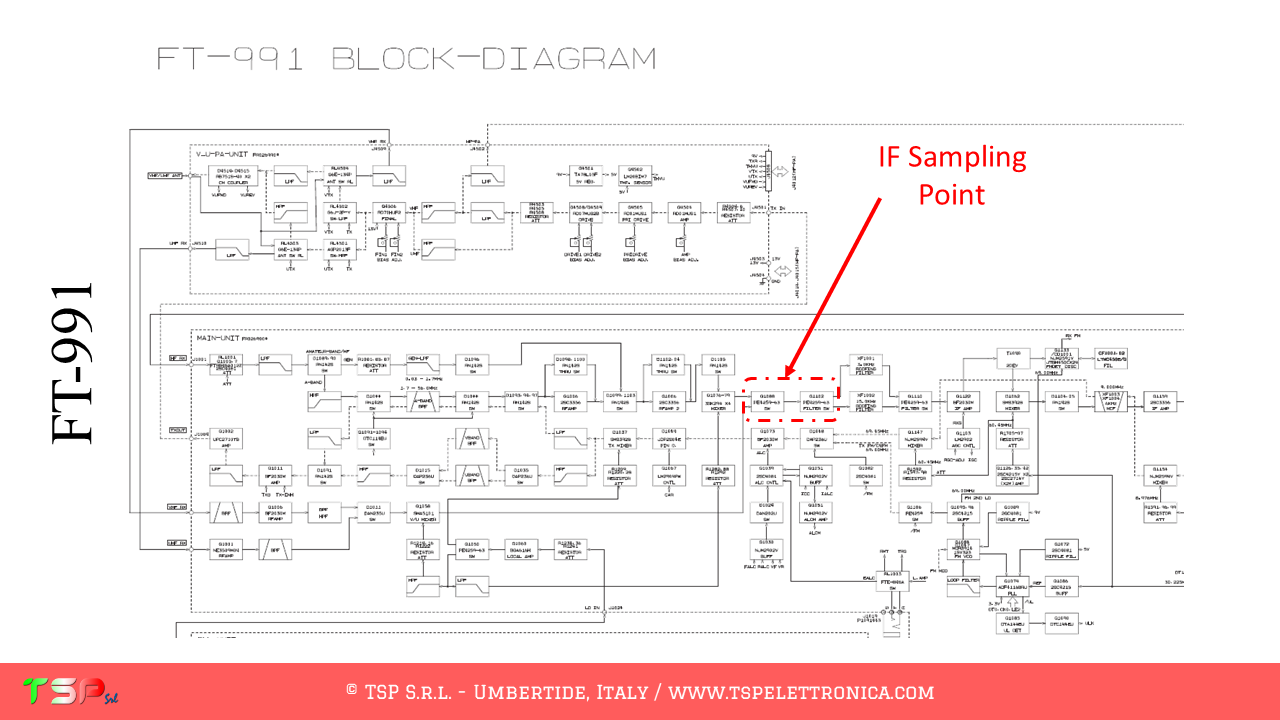
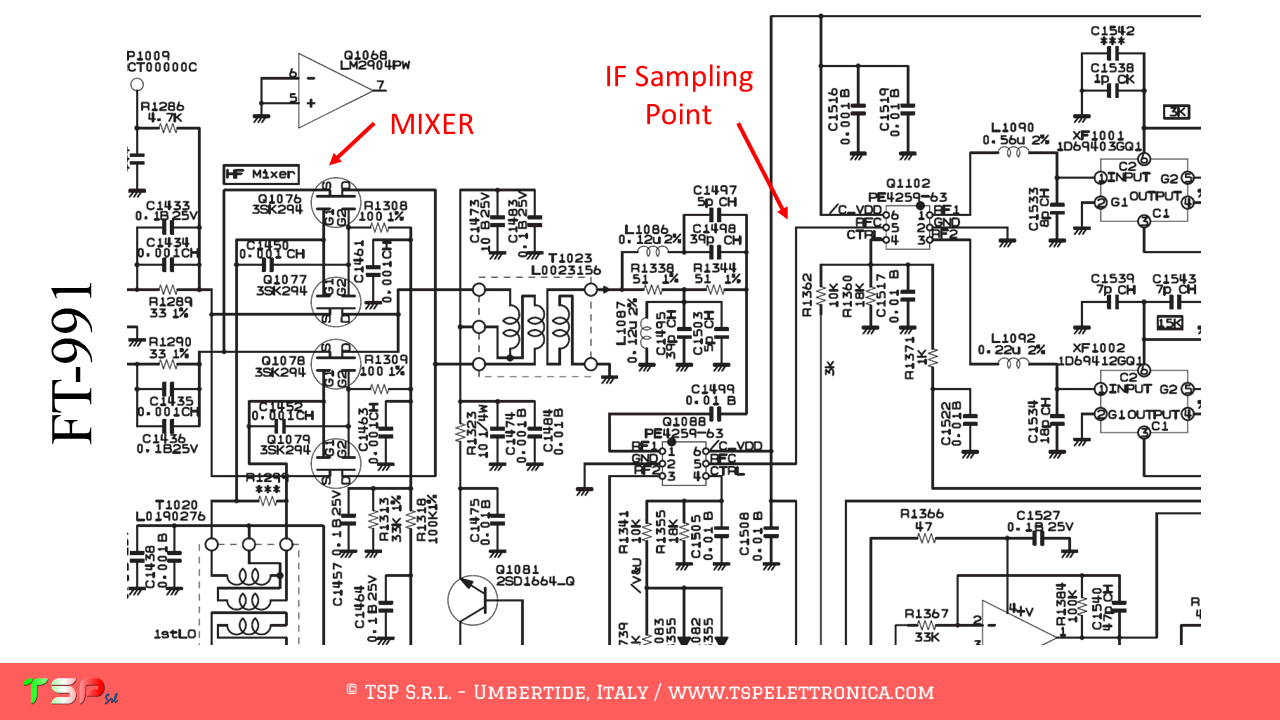
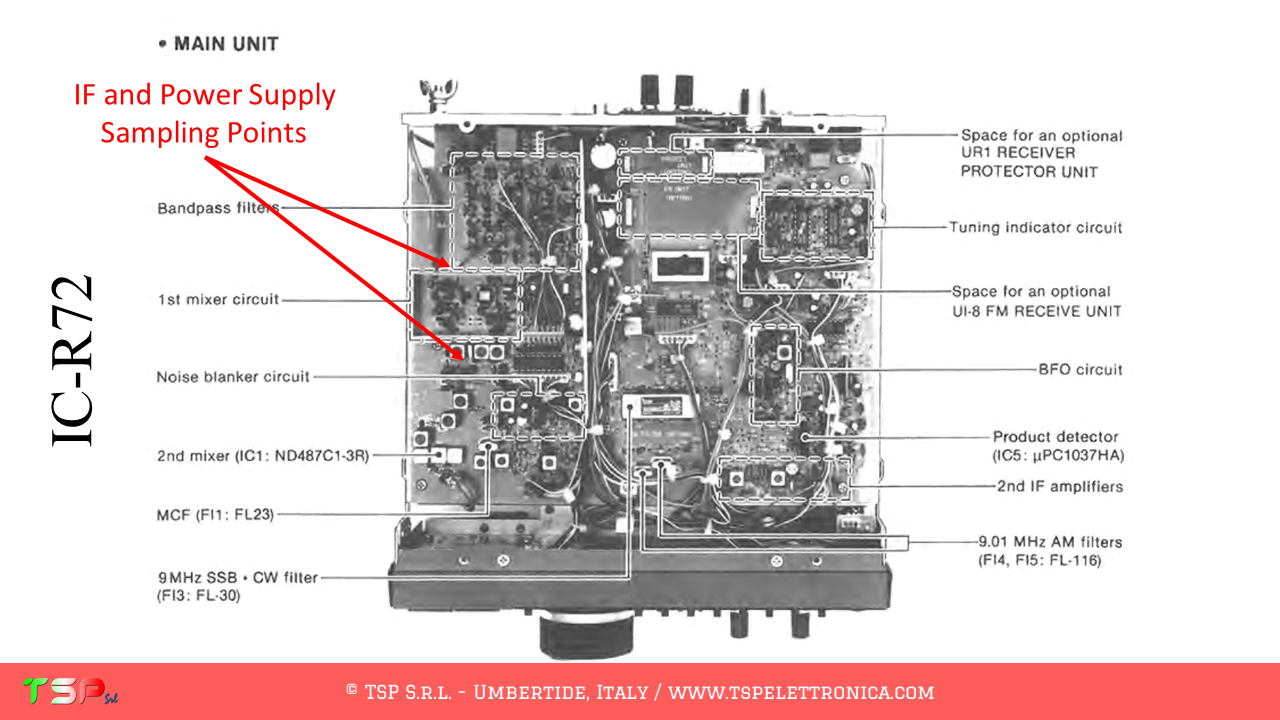
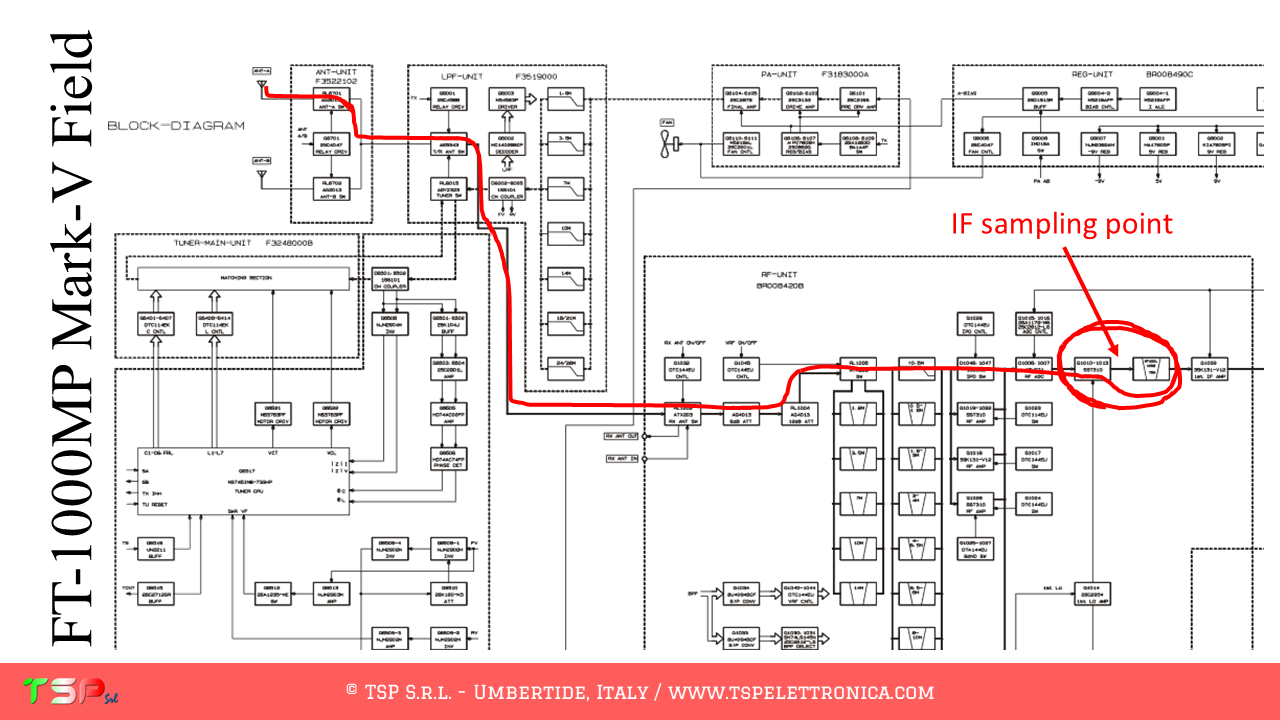
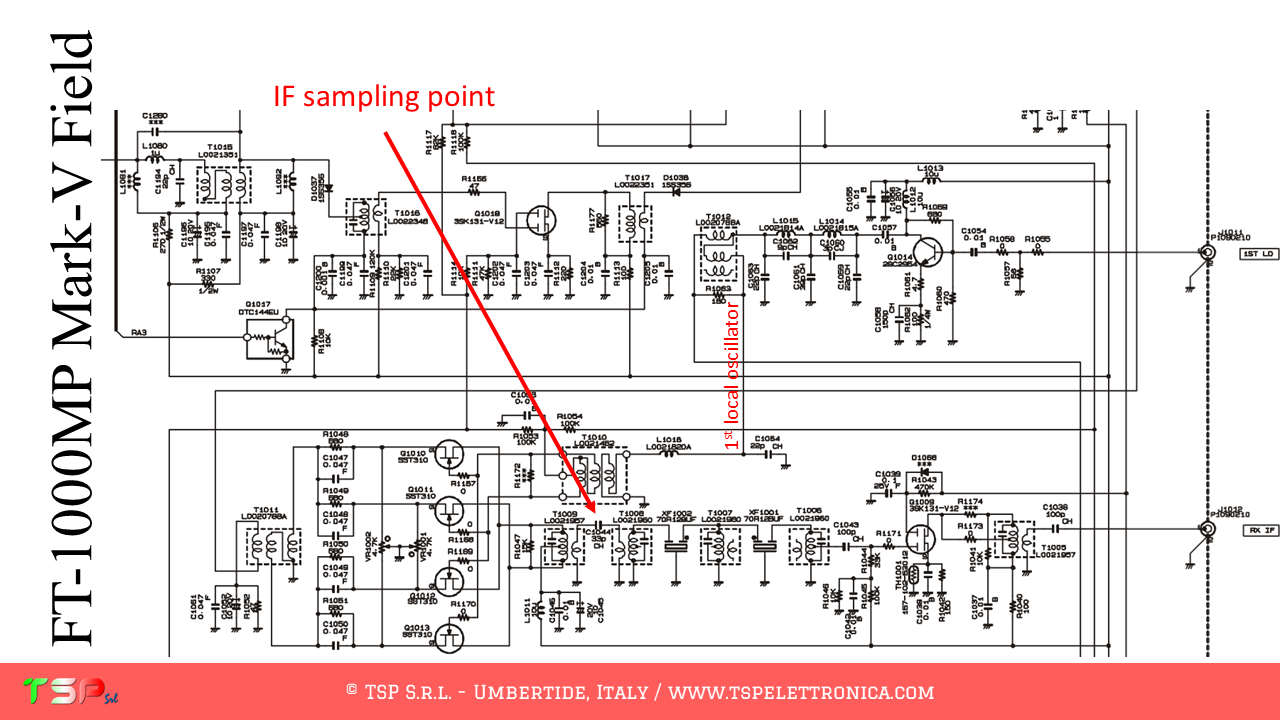
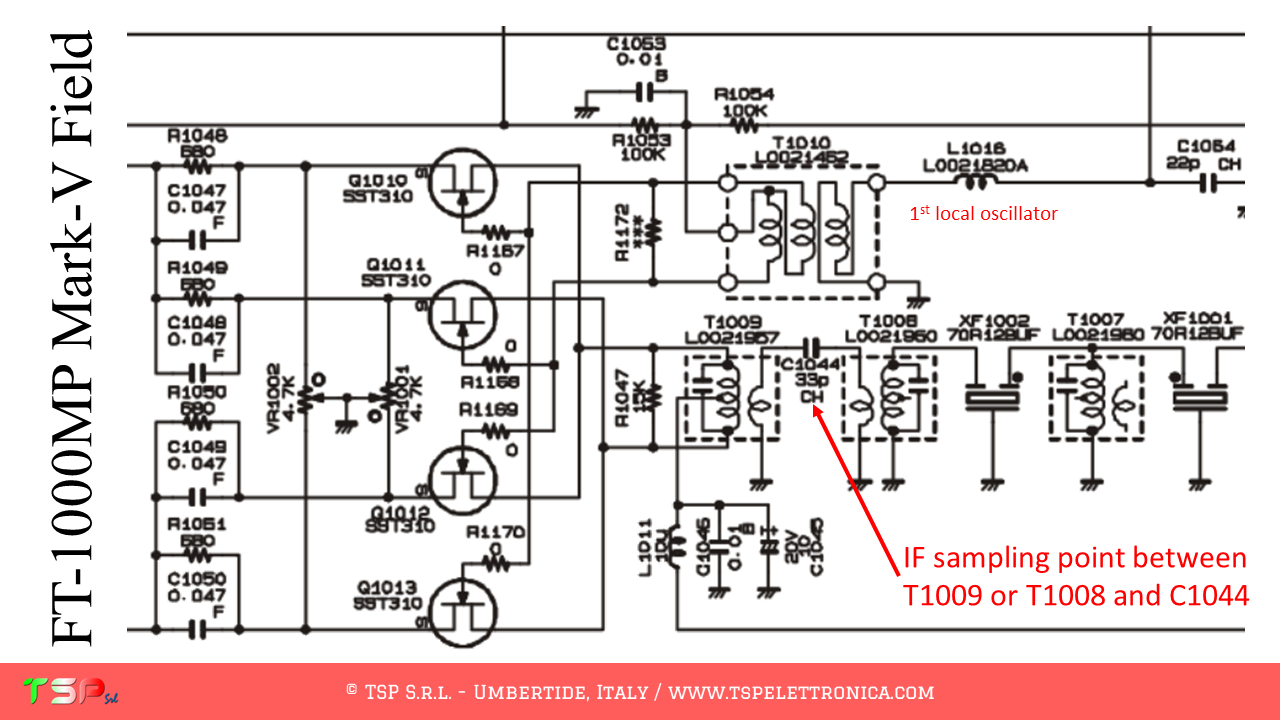
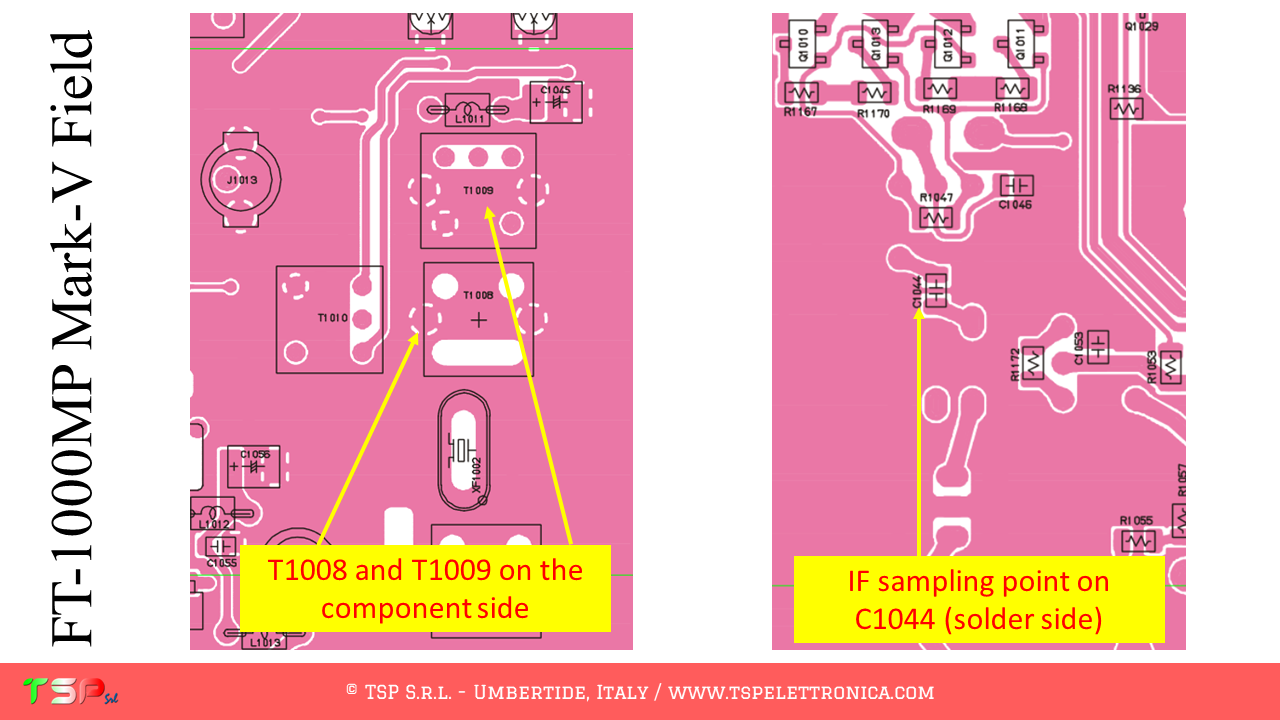
The FT-1000MP Mark-V Field, like other radios, has a very complex configuration and uses different intermediate frequencies. We are interested in having a “wide band” signal, so it will have to be picked up before the main band pass filter. The sequence of operations to be performed to obtain a sufficient bandwidth to realize a panoramic receiver around the chosen IF frequency (70.455 MHz) is shown below. The path of the TX and RX signals is partly separate, so the PTT command to disable the IFace during transmission will not be necessary. The following images show the point where the IF signal will be taken.

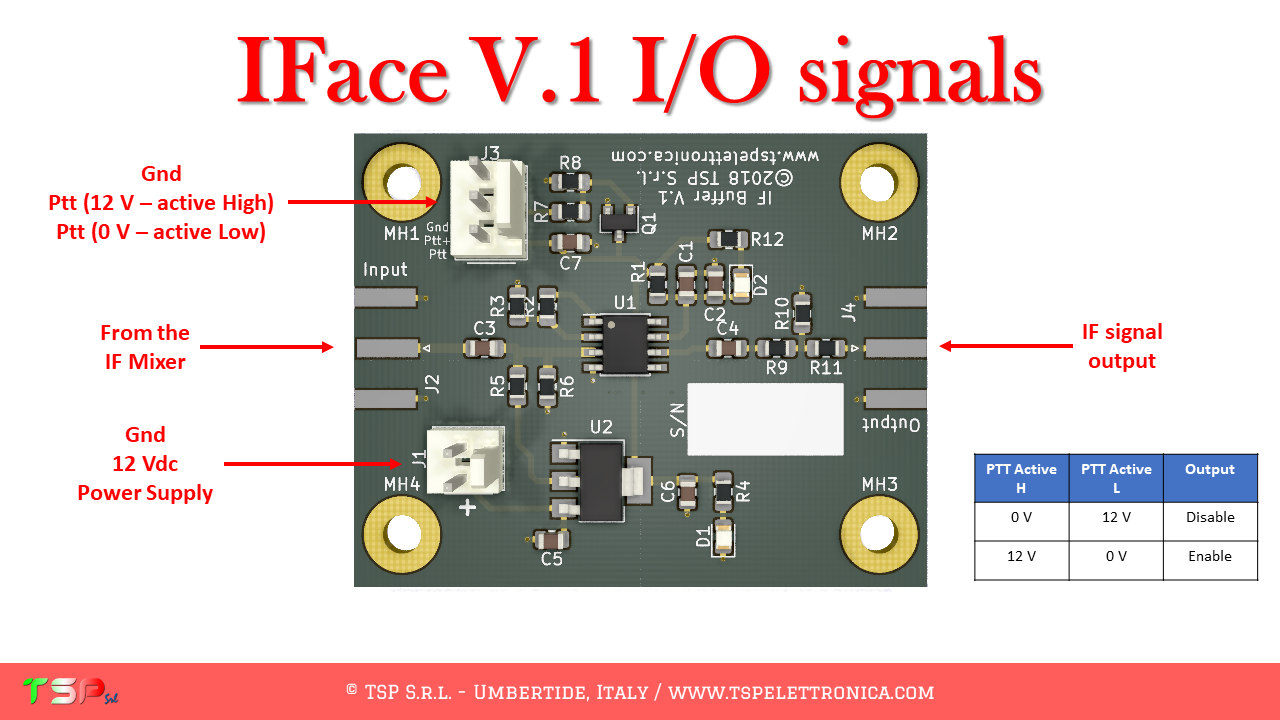
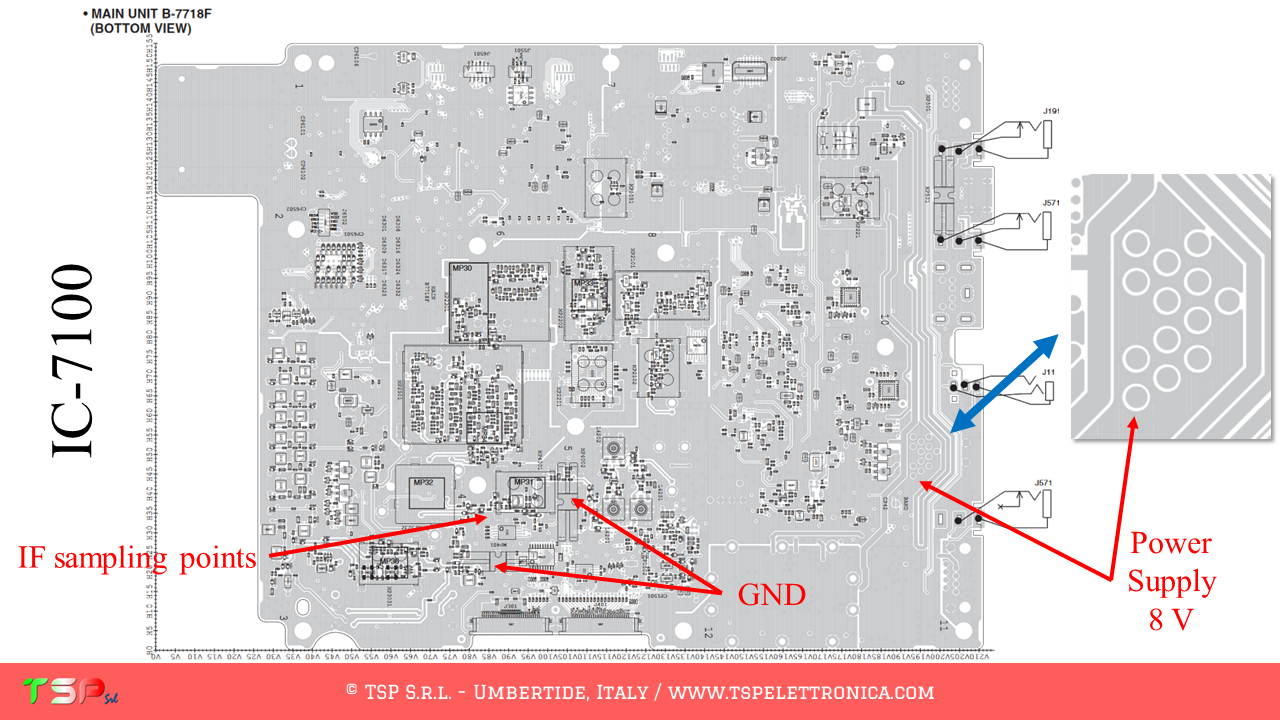
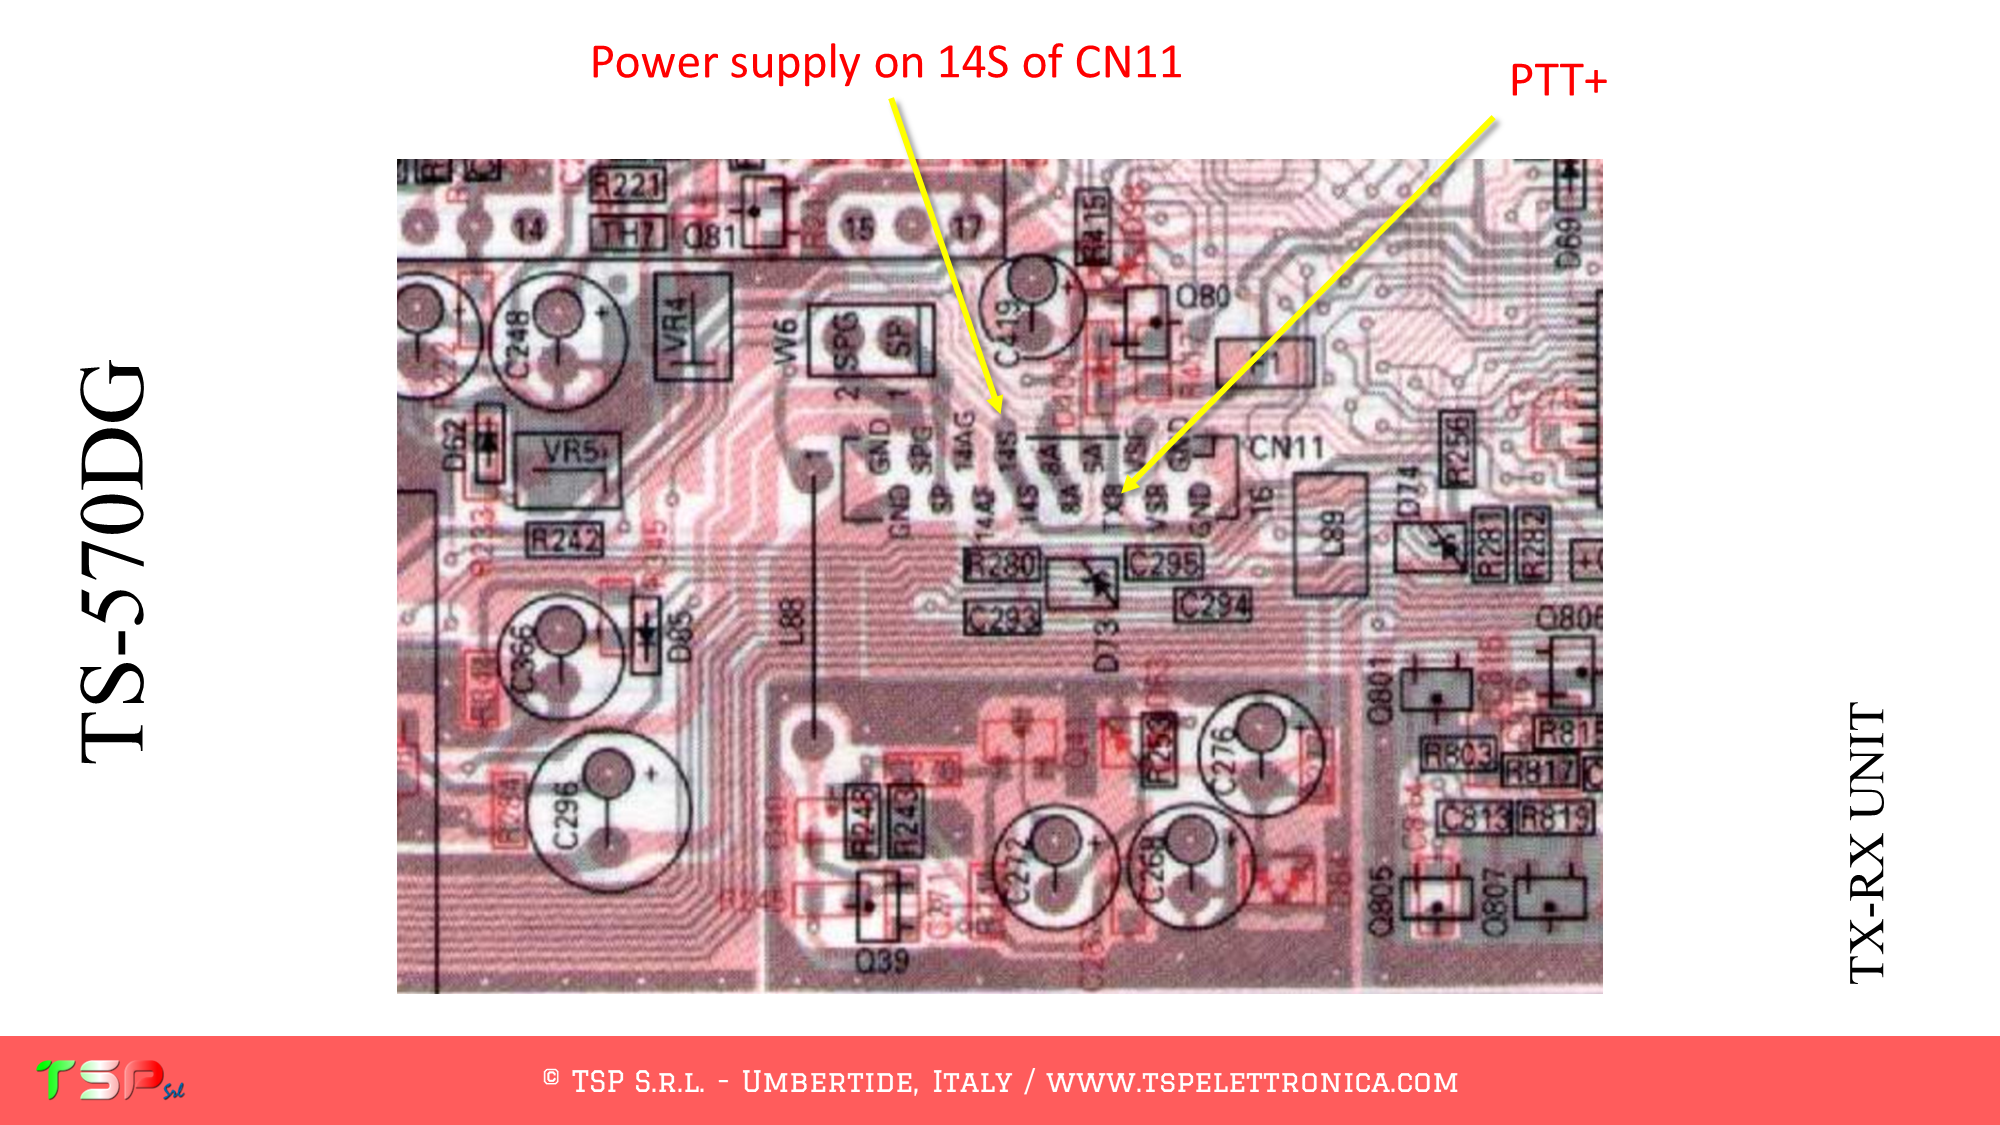
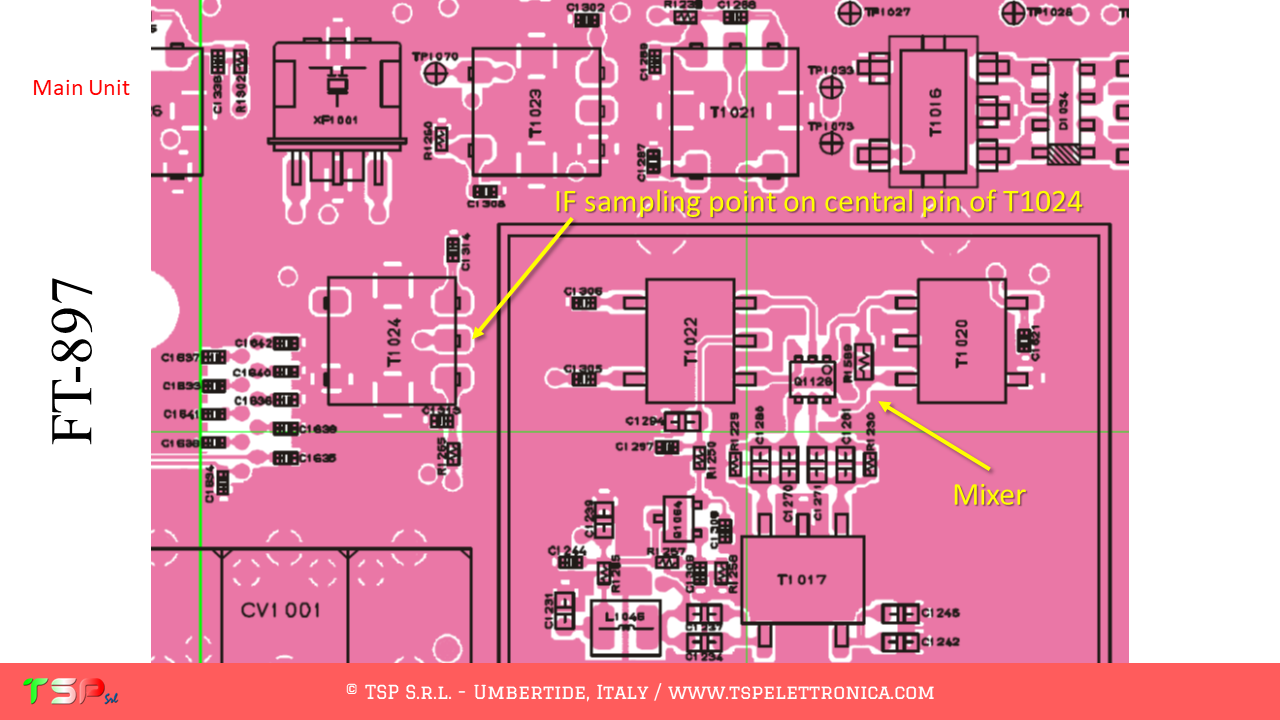
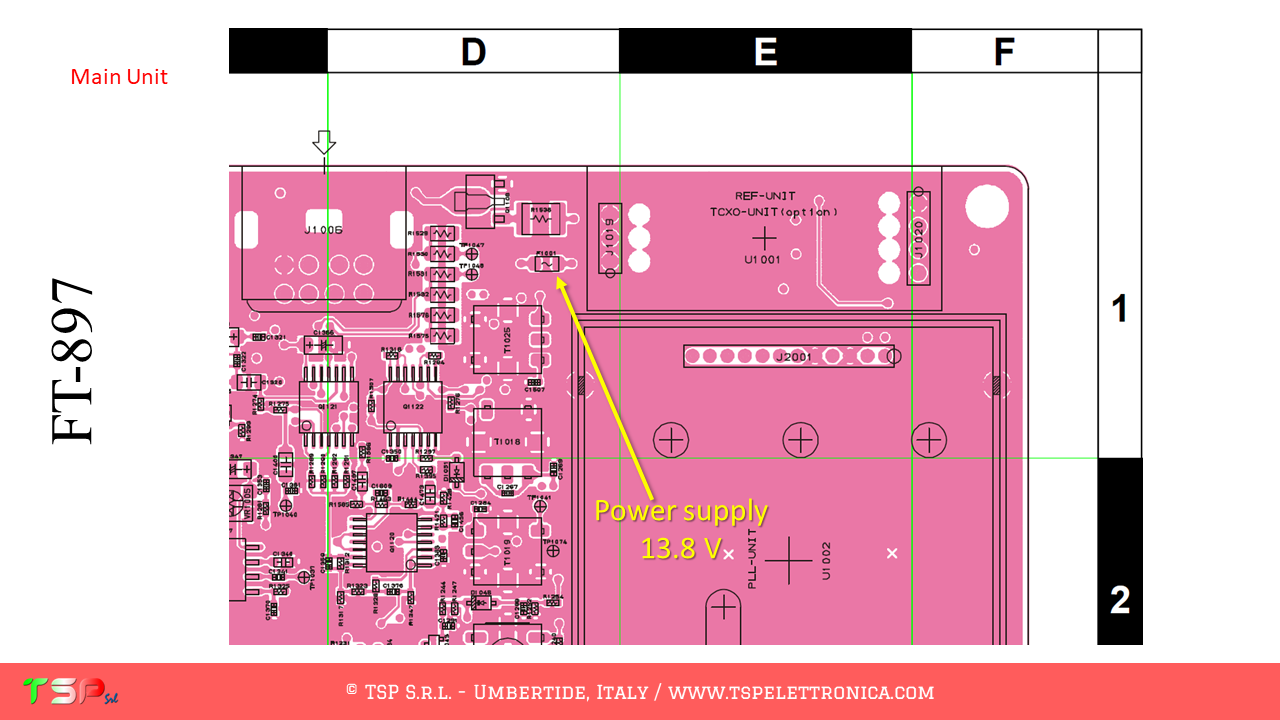
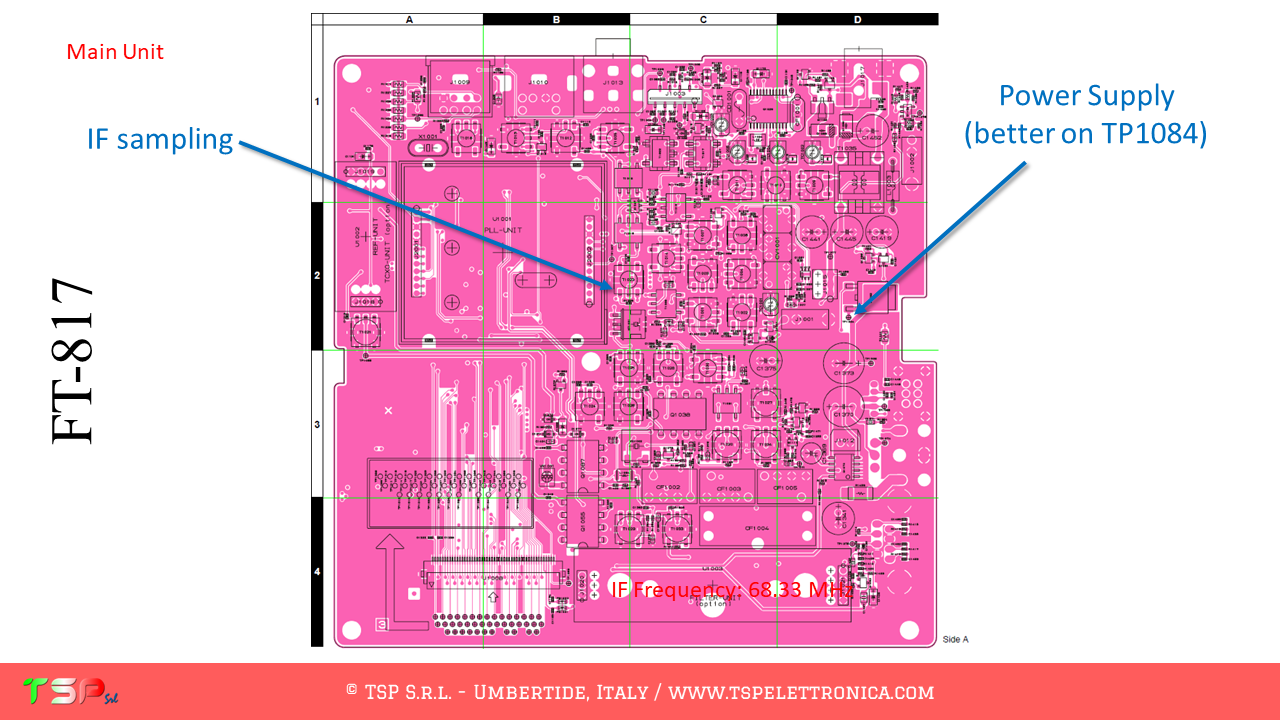
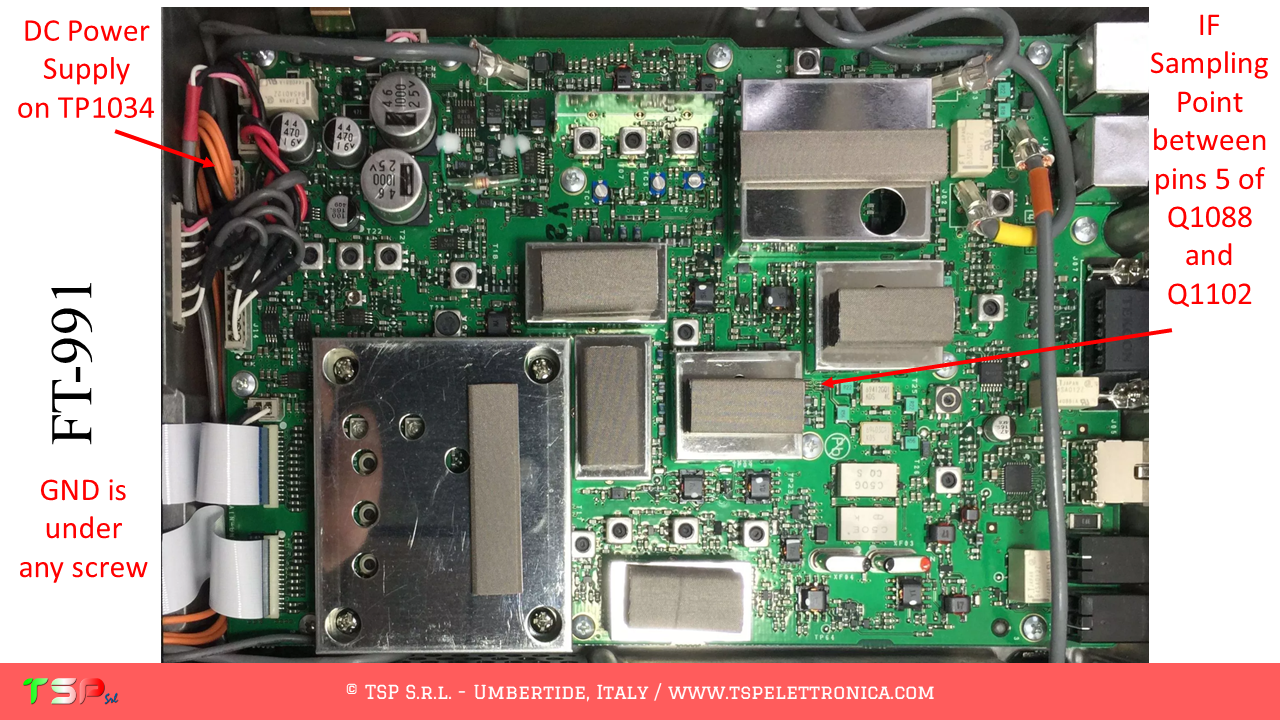
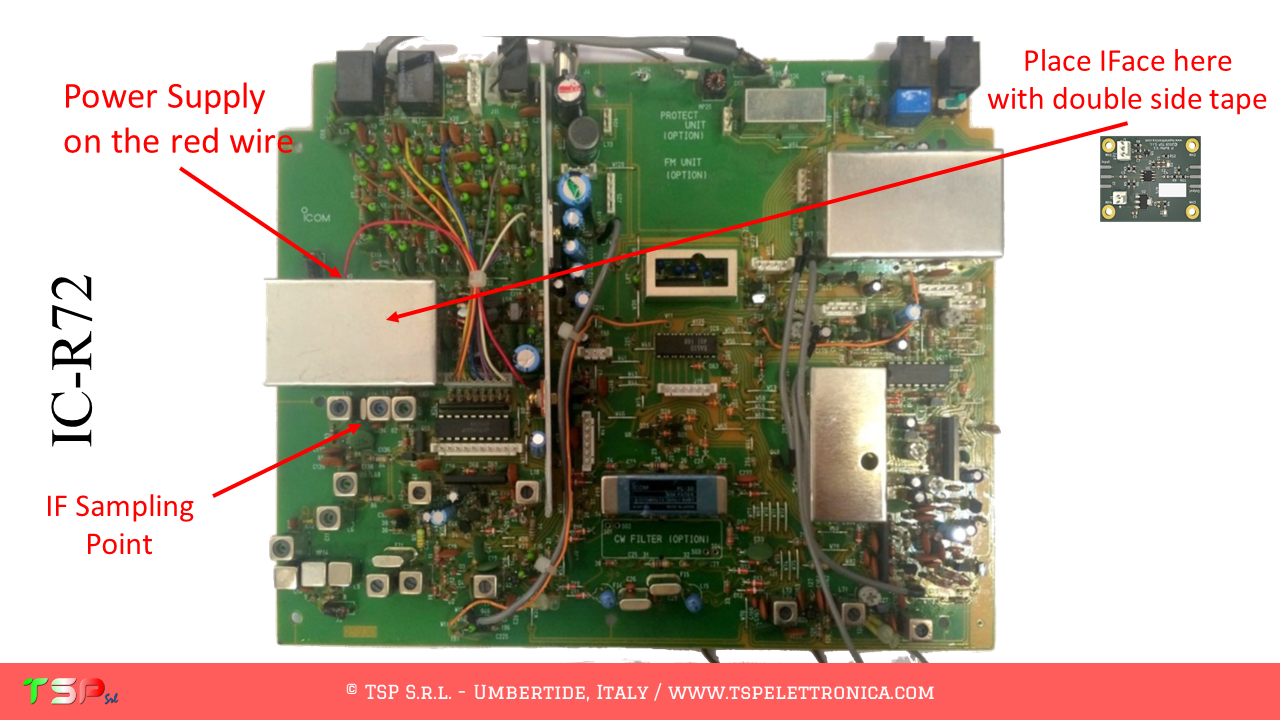
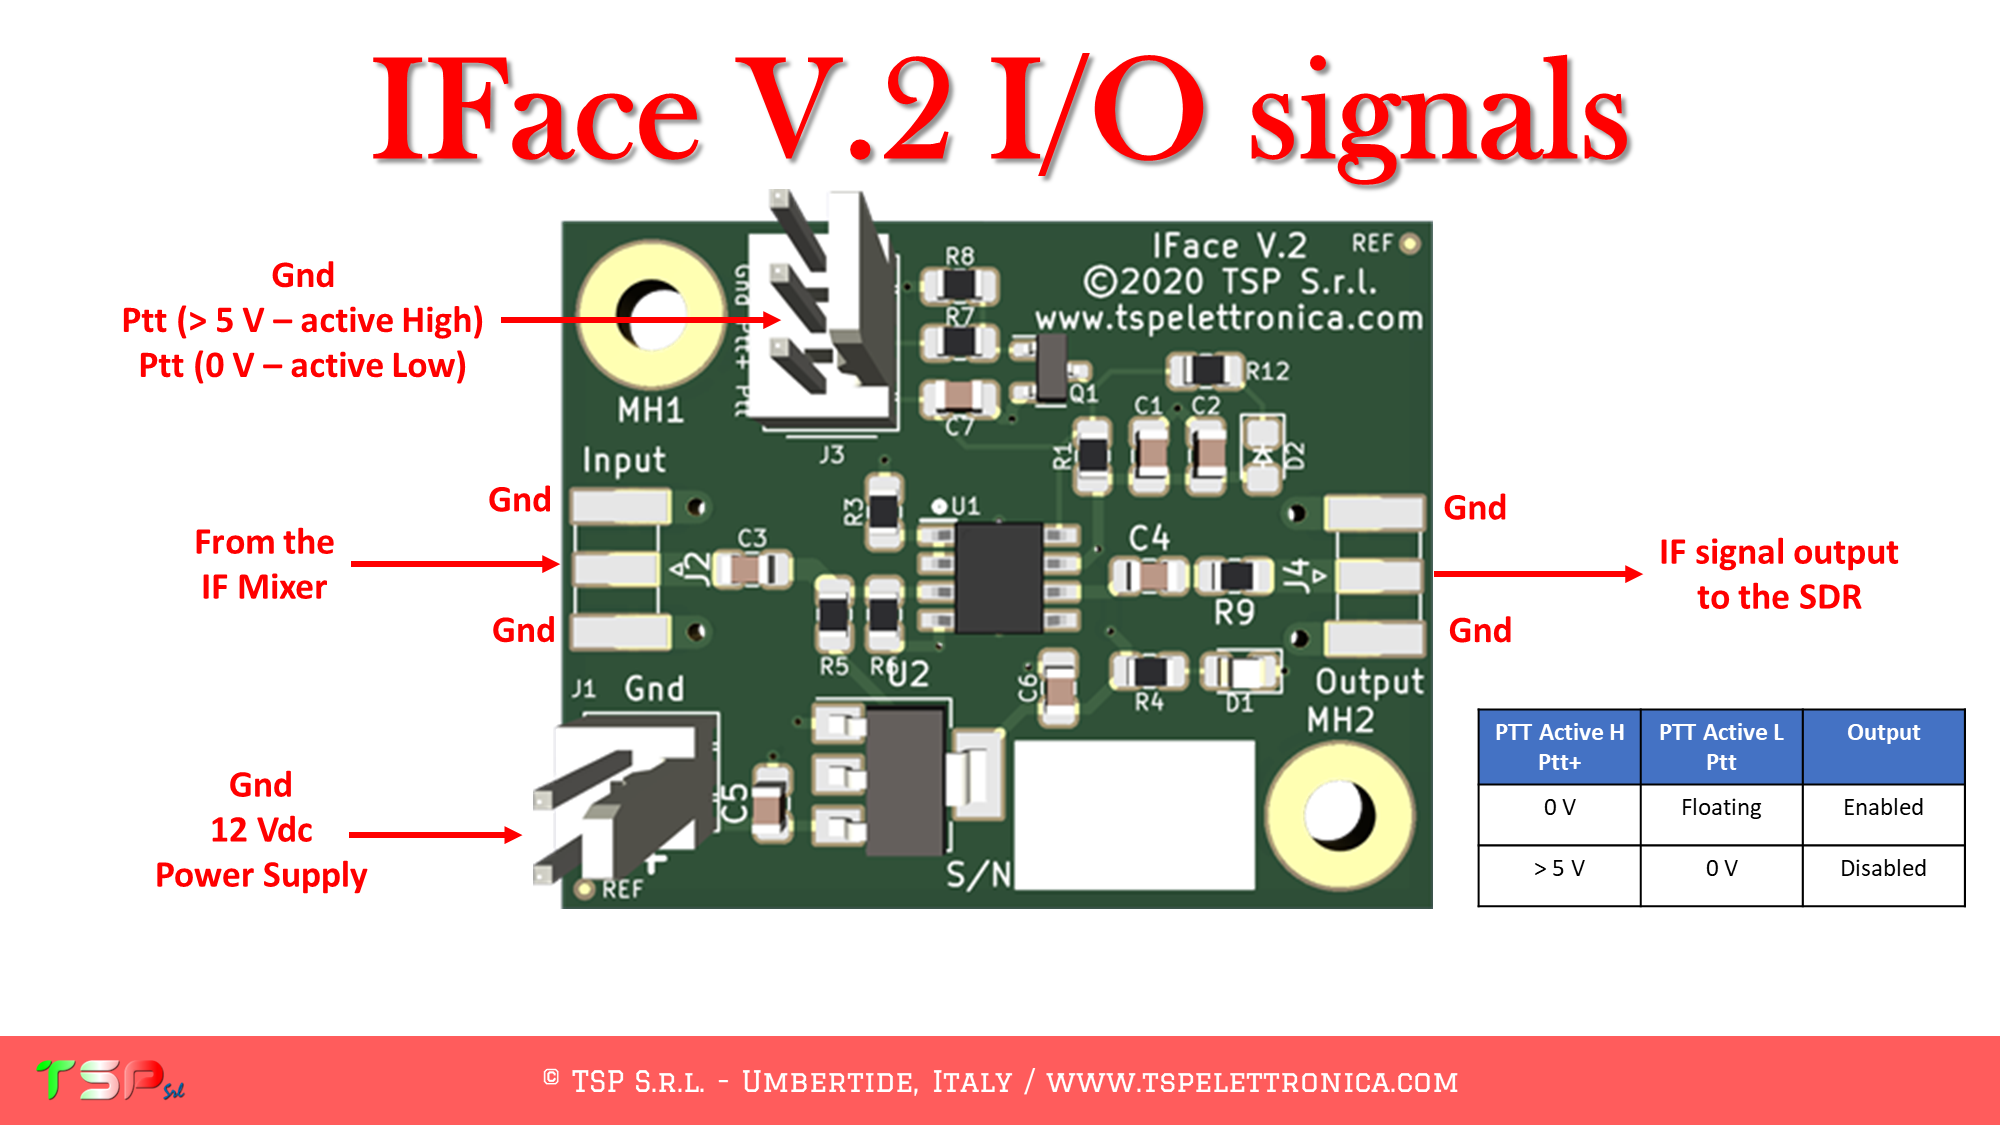
Now we need to locate the points where to connect the electric cables to the IFace. The following images illustrate where to get the various signals on the RF UNIT.


If you like the idea and the goodness of the proposal buy an IFace using the button below.

ATTENTION: Though installing the IFace is not difficult, you do this at your own risk. TSP S.r.l. is not responsible for any damage, unwanted side-effects or whatever.
For more information do not hesitate to write us.
Have fun!